Tuesday 28 June 2016

A Good Luck Card


This card was made in March 2014. I loved it too much to give it away and ended up hoarding it. It finally found its way to a dear friend at the inauguration of a new office. Am so glad it found the right recipient.


The background is made with homemade gesso. Here are a couple of links for making gesso at home 

I used talcum powder and also some powdered marble powder instead of plaster of paris. Also, I did not use white paint and hence, the off white effect.


Monday 27 June 2016

A Blue Card for Someone Sweet!


Made in March 2014.


I finally could lay my hands on some blue and yellow quilling paper and made the most of it.


I was inspired by one of the finest quillers around for the petals of blue flower. I have not seen anything as beautiful as can be found here. Do check out this link. I only hope that over time, my work too turns out to be as beautiful and as unique!

This is how the petals for a single flower should have been arranged. Unfortunately, I ran out of paper and could not lay my hands on more paper of the same shades


Tuesday 21 June 2016

Intricate Quilling


I wanted to try my hand at doing something different and more intricate.

The quilling turned out just as I wished but the background metallic paint was so botched up. I decided to never paint a background with metallic colours for a card again.


Blue Floral Card


Made in November 2013


Sunday 19 June 2016

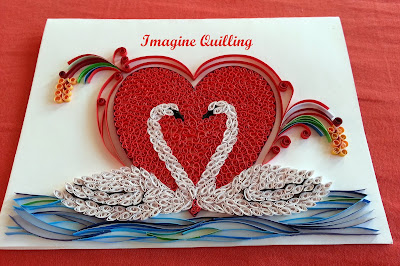
An Anniversary Card for My Darling Hubby


Until now I had only tried my hand at floral quilling and all the cards that I made went to my girlfriends. On my anniversary I decided to come up with something different with love as the motif; something which my husband would not be able to call girly.


Basket of Flowers


This was the first project done in the year of 2014

I used 10mm strips for the horizontal lines of the basket and 3mm for the vertical ones. It was really difficult to roll up the paper for the basket handle probably because the paper was so broad.

The pictures are not of a very good quality as they were clicked in really low light.


Saturday 18 June 2016

Letter Quilling


Made in December, 2013.


I printed out the letters HAPPY BIRTHDAY, cut each letter and stuck it onto the card. Then I did the swirls on the letters.


I found instructions for making the flower which is called the Royal Flower here.

Birthday Card


Made in December, 2013


Quilling with Bronze Metallic Paper


Made in December, 2013

The brown background is cotton silk cloth which has been stuck on handmade cream coloured paper. Just some swirls thrown about with bronze colured metallic paper from this set.


Anniversary Cards


This was made at the end of November of 2013 for the wedding anniversaries of two friends.

The red flower is called a Malaysian Flower and the instructions for the flowers are available at this YouTube Video https://www.youtube.com/watch?v=dzqhRaC3G1k


Thursday 16 June 2016

Snowflake


This was made for the Christmas of 2013. 

Silver 3 mm quilling paper has been used for the snowflake.


Beehive Quilling


This was my first trial at beehive quilling. I put it into a simple paper frame.

The instructions for the paper frame can be found at http://increations.blogspot.in/2009/06/how-to-make-simple-paper-frame.html

And here is the video link to learn beehive quilling https://www.youtube.com/watch?v=1ZdE7HUAd04


Done in the December of 2013 for a birthday.


Birthday Cards


Some birthday cards made during September 2013


Quilled Garden


A garden made from quilling in the October of 2013


A card with a bow for a dear friend

This one was made for the birthday of a dear friend in May 2013


Wednesday 15 June 2016

Some Cards Made for Little Girls


3 and a Half Year Journey into Quilling


It has been 3 and a half years since my foray into this beautiful journey of quilling. Having had no connect with anything related to art for all of my adult life, it has been a transformative experience. 


It all happened when i chanced upon the work of Yulia Brodskaya (check out http://www.artyulia.co.uk/). She is without doubt the best quilling artist out there. Within an hour, I cut up some paper strips, and using a thick plastic quilling tool from my son's set, I tried out this one.


I was very displeased with the result but then, it was my first attempt at quilling. I have become better at it but am nowhere as good as some of the some of the awe inspiring quilling artists I see on the web. I thank all of them for continuously inspiring me to try harder.


This one was made in October 2012


After that I tried another of Yulia's work


And then I felt I was ready to set out on my journey into the quilling world by doing my own work.